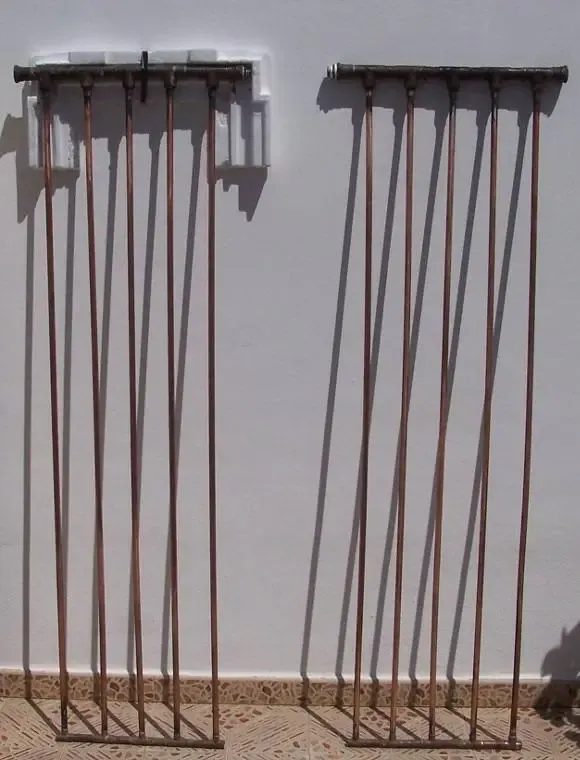
Building the bars for a homemade collector is quite a bit of work, and quite dirty.
But it's what we need to do to fill our solar collector box.
In my case, the inside of my homemade solar collector is made of copper.
This is what I recommend, it's the most important part of the whole system, and it will be the one that directly transmits all the heat to the heat-carrying liquid (in our case, water)
If you decide to build your homemade collector bars out of copper, you will need:
It is a fairly small investment that you can then save for other purposes.
I made 2 copper collectors:
Each solar collector is made up of 5 copper bars with a diameter of 15 and approximately 1.64m long. If you make it 2 meters long, it will work. much better.
Both bars of the homemade collector are joined, at the top with 22-side and 15-center TES.
The union between the horizontal and the vertical ones is made with the 5 reductions from 22 to 15
Joined at the bottom with 18-side and 15-center TES
Each set of bars of the homemade collector is mounted like this:
The reason that the top is 22-side and the bottom 18-side is not for nothing in concrete.
It is due to the lack of concrete pieces, and it is what I have been "catching" from one place or another.
The only important thing to keep in mind is that the horizontal bars where all the vertical bars meet have a larger diameter. Because that is where all the waters of the vertical bars meet.
Let's say that... so to speak and to understand it quickly, the vertical bars would be like the arms of a river or small rivers, and the horizontal bars would be the source and the mouth.
I don't know exactly what size is the most ideal, but it is clear that if the horizontal bars are equal or smaller than the vertical bars we will be causing a bottleneck, as if we wanted to put the Amazon River in a hose, and if it is very large I don't know what the negative aspect will be, but the positive is that it will have more heating surface.
Since not all experiences are the same and we don't like to take the plunge with a complex model, we can practice with other models.
In order to discover what we can expect from our sun and our location.
We can quickly make a coil with black irrigation hose.
The great advantages of this homemade plastic-based collector is that it is very cheap and very affordable.
We also have to consider the disadvantages.
This coiled tube design will trap a lot of air and it will cost us a lot to keep the tube sealed. completely filled with water.
These air pockets will be in the upper curves of each turn of the hose.
We can use high-pressure water to drag these air pockets outwards.
If with this homemade plastic hose collector we get hot water in a reasonable time, we can expect much better results with a copper collector.
This collector model is the first one I made myself and I was really surprised.
So I was pretty clear about the investment I was going to make by building a homemade copper collector.
This collector is very easy to make.
The advantage of this design is that the copper captures light at 360º and that is why it heats up quite quickly.
We can also enhance it by installing reflectors on the back so that the light towards the copper is even greater.
So which in summer would be a very efficient collector.
The disadvantages of this copper collector withpolyethylene terephthalate (PET) bottles is that the plastic degrades after a few months and loses transparency.
The seal between the bottles would also suffer from this natural degradation.
But another major disadvantage is that it is not very effective in its greenhouse effect, and we notice this every time the sun goes down.