misolarcasero.com


The profiles provide structure and support to the collector box. Materials, cuts, and assembly of the profiles for the 2025 model.
And here's a really cool and impressive trick that was revealed to me. My great friend Julio.
Julio uses the same system and differential thermostat as this project.
Use square aluminum profiles, which are sold at Obramat at a very reasonable cost.
Obramat rectangular aluminum profile
The trick and the result: you make a great, high-quality box, very durable with zero maintenance. With very little money, about €100, which may seem expensive, but try finding an aluminum box for that price; even wood is very expensive these days.
The This DIY project involves taking each of those profiles and cutting them in half with a circular saw. As if we wanted to make two pieces for a photo frame from that profile. That is, to obtain two U-shaped profiles from that square tube. It would look something like this:
All profiles will have this structure.
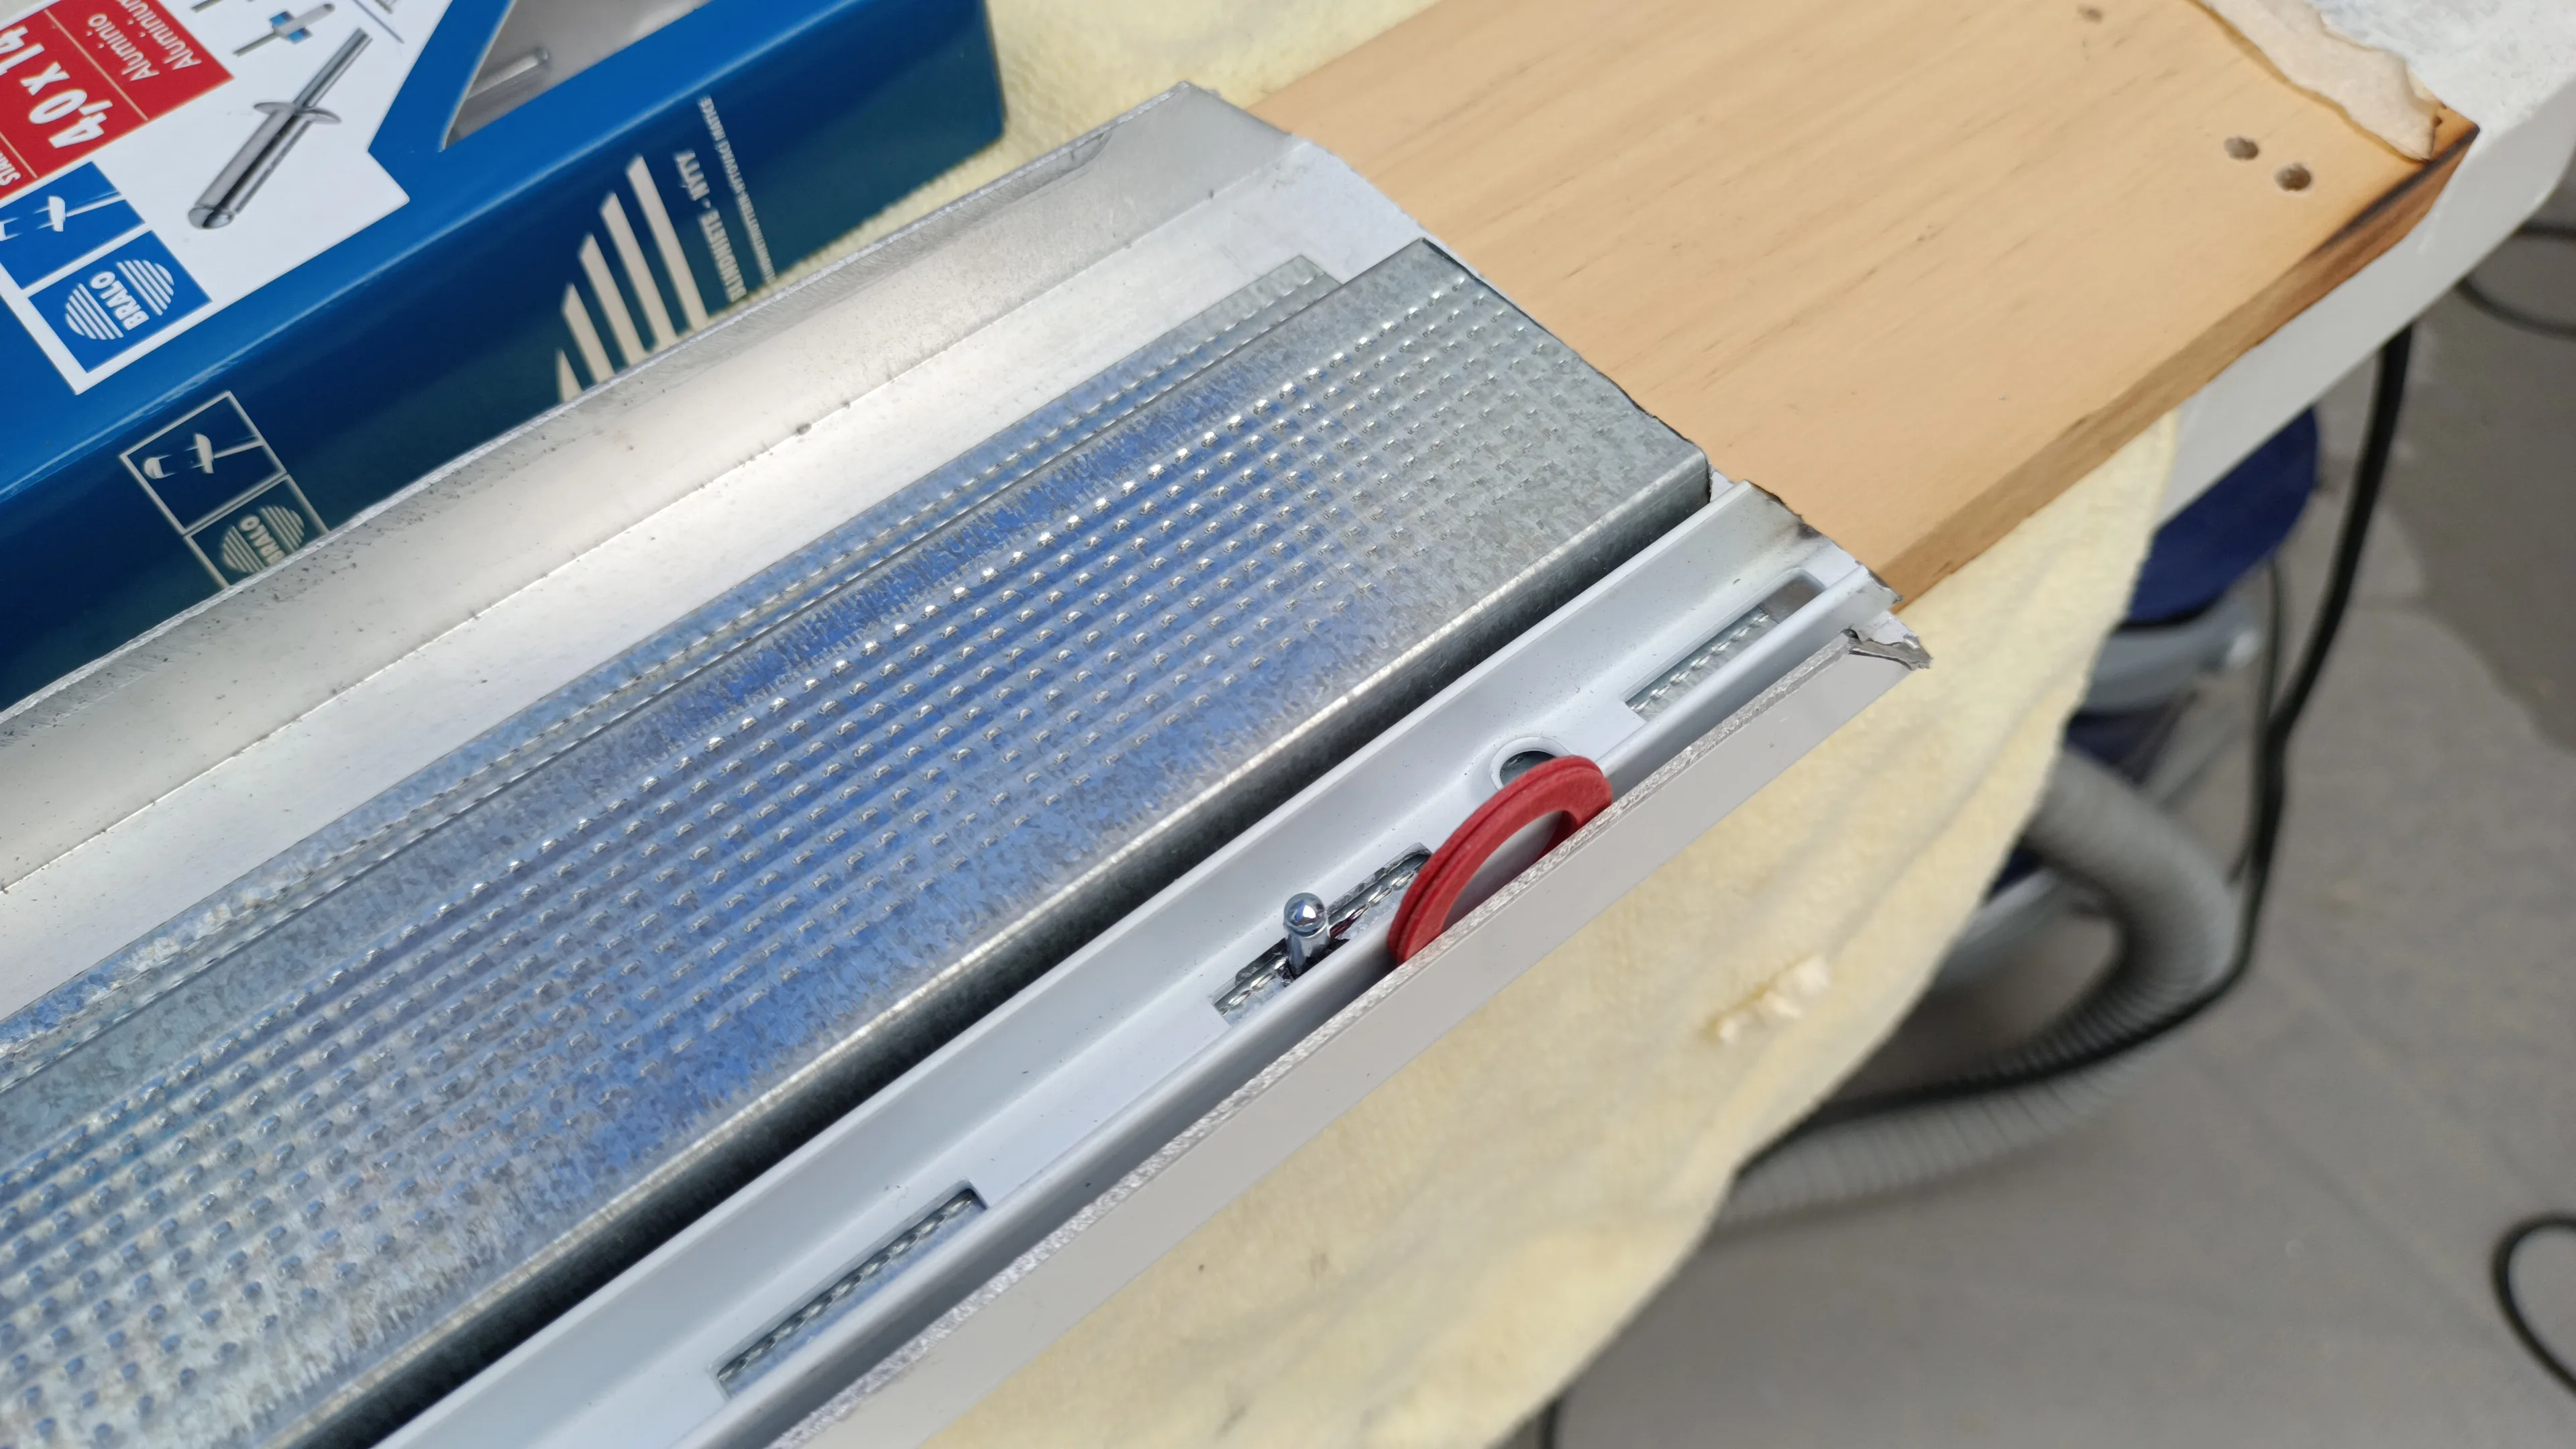
The EGA profile (the inverted U-shaped sheet) is used to separate the heat source from the aluminum profile. It is also the perfect size for the profile dimensions and fits the guide, while maintaining separation with a bit of rock wool. The guide is for fitting the polycarbonate screen.
Between the aluminum profile and the components, there is a separation with Teflon gaskets and special heat-resistant silicone. The Teflon gaskets are not visible, but they are there. Inside, between the aluminum profile and the Ega profile, right around each rivet. I'm using 2 gaskets per joint; the more we separate the guide from the box, the better. Much better, but you have to take into account and calculate the space you leave for the polycarbonate screen.
The joints are like this (they have to be special to withstand high temperatures)
An EGA profile, or EGA master profile, is this, and it's very common to find it in DIY stores because it's used for assembling plasterboard walls.
It looks like this:
Between the guide and the aluminum profile of the box, you also have to leave a little separation, as a thermal barrier.
I used 2 red plumbing gaskets to maintain that margin before creating the joint with the rivets, and where I could later fill with silicone.
1 - The aluminum profile
2 - The rivets that hold the EGA profile
3 - Guide for the aluminum screen
4 - Special heat-resistant silicone
5 - Teflon gaskets to separate the components of the aluminum profile
6 - Rivet that holds the components, passing through the Teflon to maintain the thermal distance.
L - Rock wool
The profile would look like this: when it's done everything assembled and closed.
1 - The aluminum profile
2 - The rivets that hold the EGA profile
3 - Guide for the aluminum screen
4 - Special heat-resistant silicone
5 - Teflon gaskets to separate the components from the aluminum profile
6 - Rivet that holds the components, passing inside the Teflon to maintain the thermal distance.
L - Rock wool
7 - Copper grill and absorber
T - Polycarbonate screen
B - Rear sheet-metal enclosure

 enthusiast with two decades of experience using this operating system, which has enriched my approach to development and technical problem solving.
  and
and  , with approximately three years of experience in
 , in addition to having a good foundation in , and
 and
and  , combining my skills with a deep passion for technology.
  environments, which I use in all my programming projects.


