MiSolarCasero.com


The homemade tank that we are going to build, or at least I, will be made of plastic.
It goes without saying that a plastic tank cannot be used for pressurized water (but I don't want pressurized water)
Any drum that is commonly used to transport food or liquids is enough for us.
Plastic drums of various sizes are used in rural settings.
They use them to store water and irrigate.
Many drums are used to transport processed food, such as olives, corn, boiled carrots and etc ...
This type of container for food transport has a deadline for use.
When this date exceeds, companies need to get rid of them.
So, at that time, it is withdrawn from circulation.
They can sell it for private uses, as is the case in our interest.
I got my 260 liter drum from someone who collected it for private use in a vegetable garden, at the low price of € 10.
It will be very important to give it several cleanings and disinfect very well with degreaser, bleach and hot water, we must not forget that it will be the water that will come out of our taps and we do not want strange odors.
Like the box, the insulation can be anything.
We must provide several layers of the best insulating materials, or the most correct insulators that we can acquire.
For my home deposit I have used in this order: (ordered from the inside to the outside)
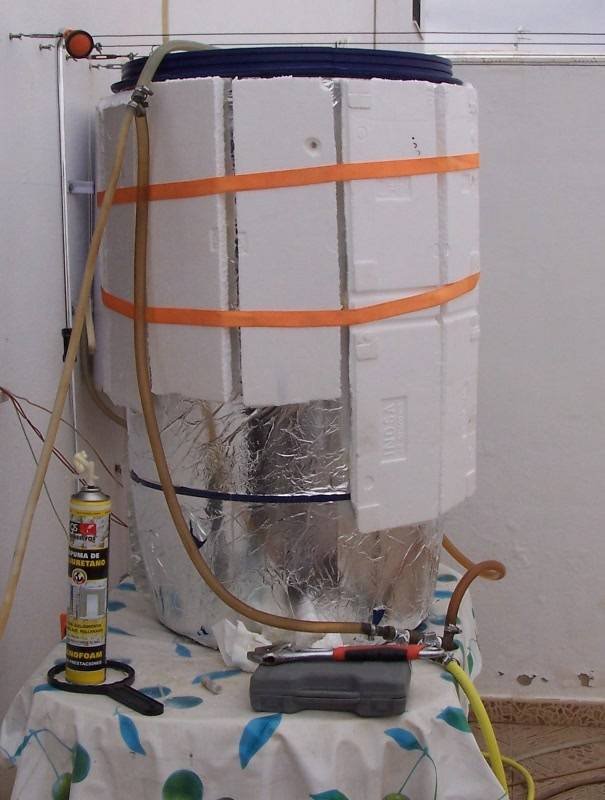
Like I said before, my first layer is several layers of aluminum foil.
And on this I am applying the layers of expanded polystyrene (widely known as white cork)

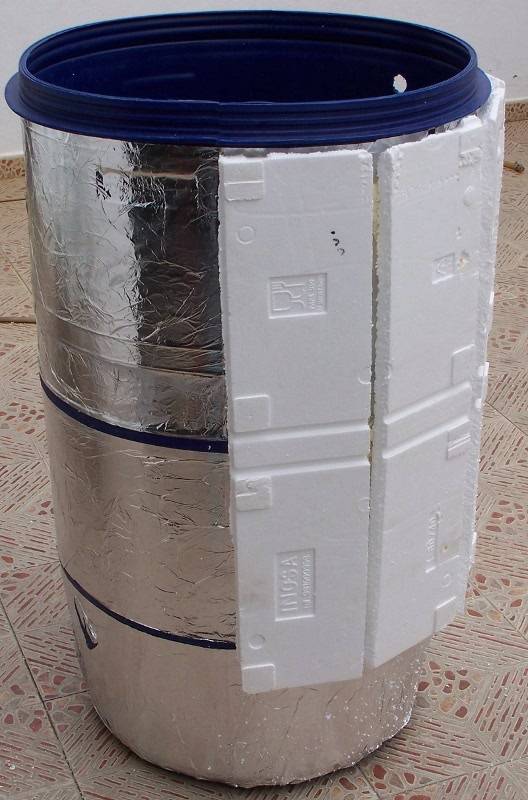
Insulating the home deposit
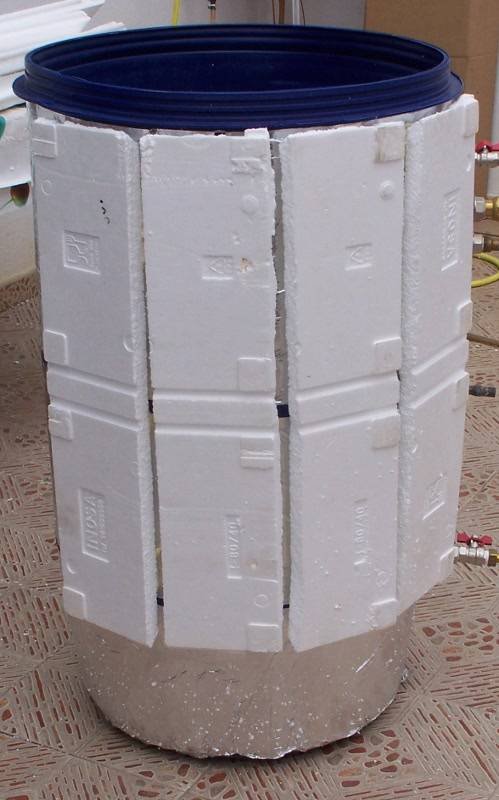
The homemade tank with pieces of polystyrene glued with polyurethane foam, will cover the largest possible extension of the drum.
I have fastened the corks with a ratchet tape.
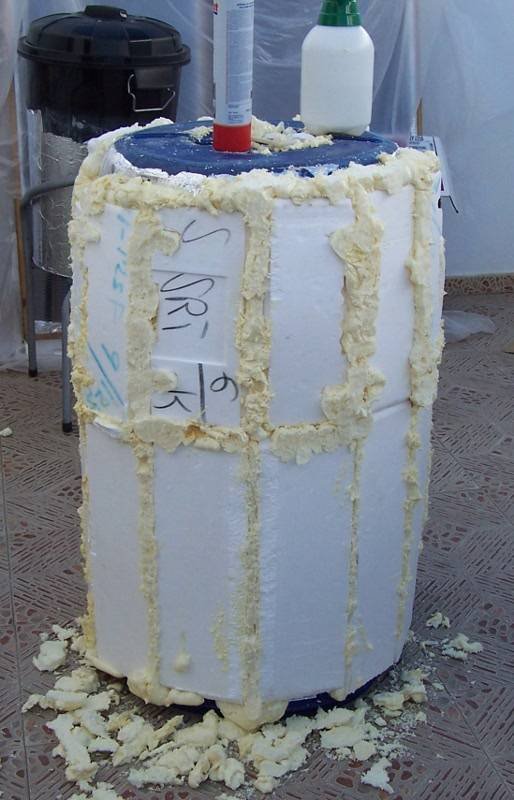
The foam swells and dries fast, but I'm not interested in getting too far apart.
The intention of the foam is to act as an adhesive, and what sticks out will cover the gaps between the plates.
Once the gluing and sealing of the polystyrene pieces is finished, the result should be a very well protected and very solid boat.
The homemade tank with sealing of the gaps with polyurethane foam: (add 1/3 of what you think is needed, because the foam swells a lot over the hours)
My last layer is cardboard, to shelter the entire assembly of the home warehouse.
Here I give the last touch with the foam, filling between the cork plates, and gluing the cardboard.
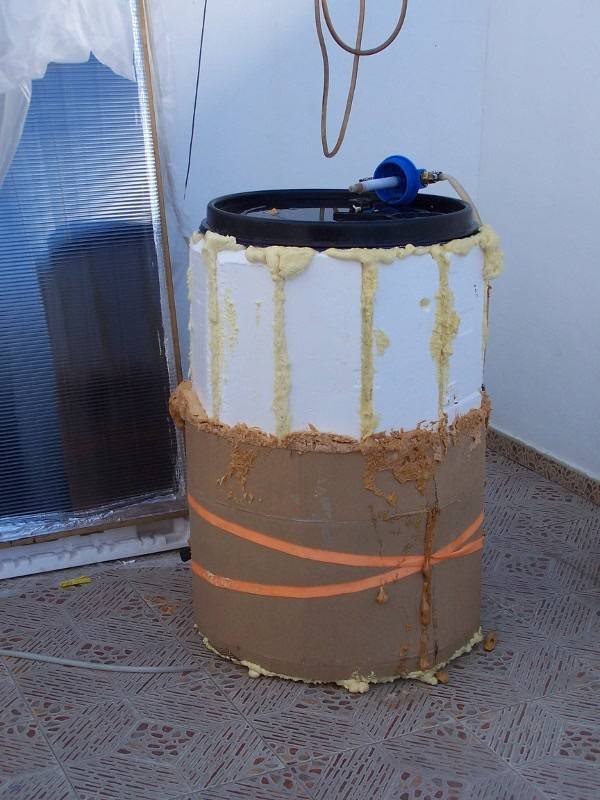
You can make some holes in the cardboard, to make filling and not leave air between the cardboard and the interior.
More than anything, so that the cardboard is part of the body, and there are no malleable lumps.
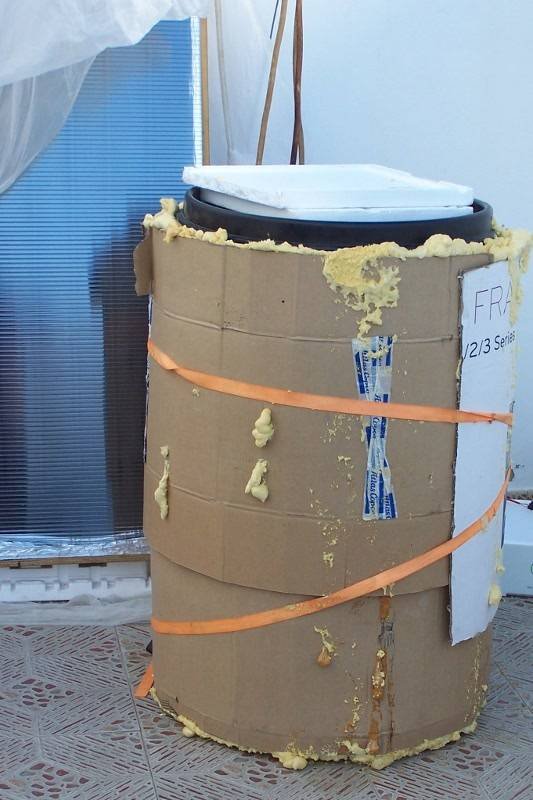
Right now the home deposit is in the state as shown in the last photo, and the insulation seems to be quite good, it loses in the cold night between 5ºC-8ºC only, not bad for a home assembly and taking into account that there are 260 liters of water, which is not the same as isolating 100 liters.
Finally we will cover it all to protect you from the sun.
We can cover it with outdoor plastic, or something similar.
Or we can also cover it with some silicone paint.
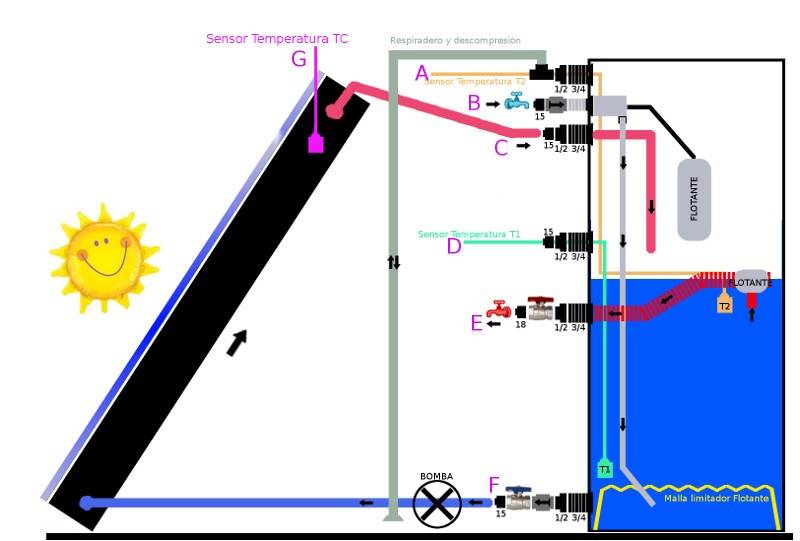
The connections to the tank must be watertight.
For this we will make these connections with cable glands.
And the temperature sensors will be coupled by "Tes".
To learn more about attaching and installing the temperature sensors, visit the Installing Temperature Sensors page.
I describe the connections that you will need to make in the tank: (The diagram belongs to my design using a fishing tube)
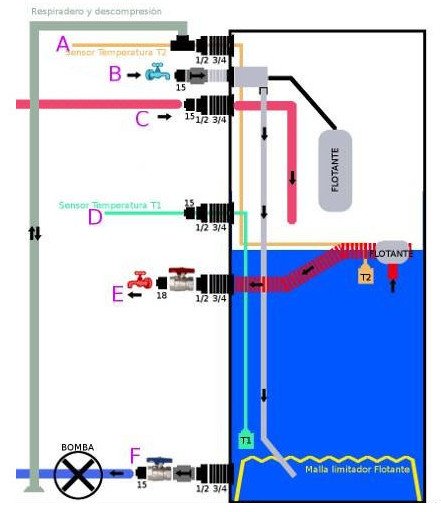
For variable level use, we only have 2 ways to "suck in" the hot water.
Using a fishing tube has seemed more suitable, and it has been quite good for me.
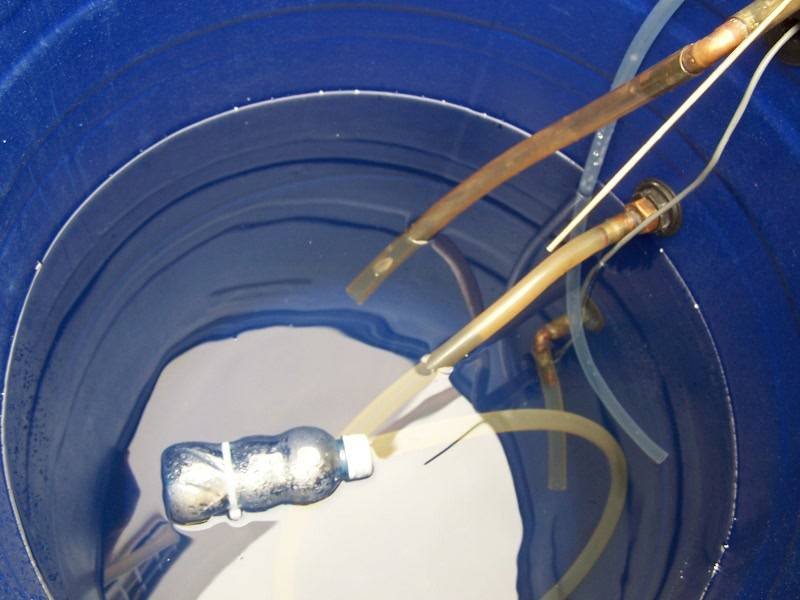
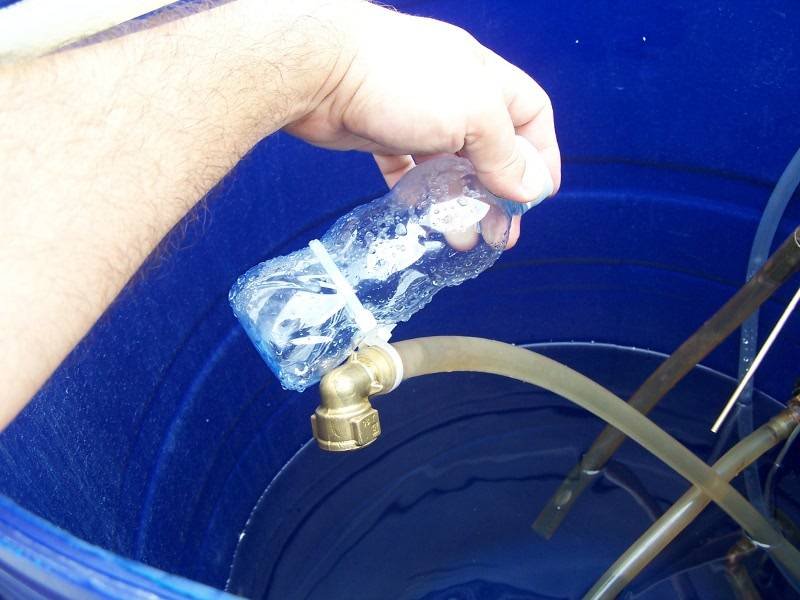
A "fisher" tube consists of a tube that is submerged, but tied to some floating element that makes the tube always draw the water from the highest possible level.
This is the fishing tube:
More detailed information on this type of pressureless tank that works by gravity in Article about pressureless tank